6. Animation
In this tutorial we will go over the process of rigging, as well as show how to animate the rig, which will in turn move the model.
Rigging
A rig is what we call the skeleton of a model. It is the bones inside the model, that when moved will also move the model. Rigs are simpler than actual human skeletons though, and the 'bones' are really just single points in 3d space which also have a direction.
To begin, open the animation project in the Tutorials folder, and select the Rattle pattern. This is a simple curve in the shape of a snake. Select Show -> Show Bones to view the single bone it has in the 3d View.

Open the Position curve and click on the point that is the head (the last point to the right), and you will see that it has specified a bone name:
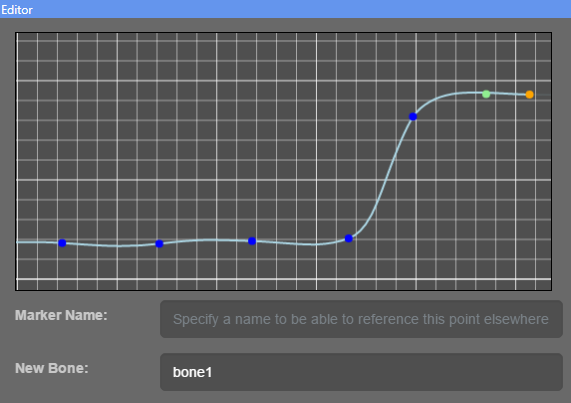
By specifying a bone name, Waveform will create a bone at this point, and will then keep extending that bone to every point it meets, until another bone name is found. As this is the only bone in the curve, it extends all the way to the end, which is why it reaches to the tail in the 3d View.
Note that the 2d view of the snake shows a mostly straight line, whereas the 3d snake is curved. This is because you are viewing the
XYaxis only, try swithcing to theXZview in theCurve Editorto see the curved line.
One bone doesn't give us a lot of flexibility, so before we move on, try giving every point in the model a bone name. You should now see a set of bones in the 3d View which follow the curve of the snake much better.
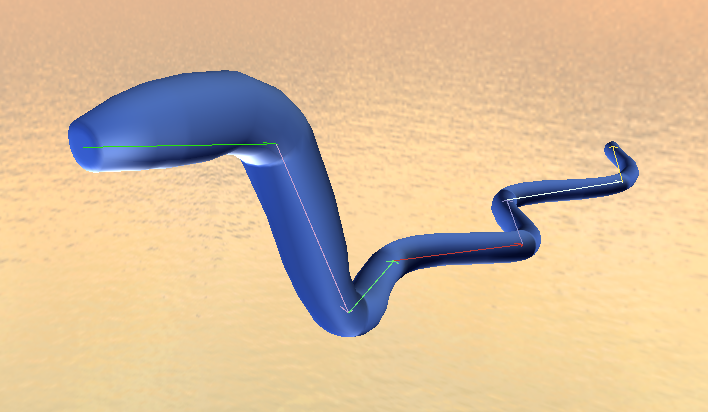
These bones are linked by a simple parent -> child relationship. Meaning each new bone that is made is parented to the last bone. Any transforms applied to a parent bone during animation, will also affect all of it's children.
Animation Poses
Animation is what we call the process of transforming the bones, which in turn transform the parts of the model they are attached to. An animation clip is made up of a set of animation poses, which it then blends between to give the illusion of movement.
To add a pose go to [+] -> Add Pose and give it a name such as pose. Lets go through the default blocks it adds:

This specifes the name, as well as what model to apply the pose too. Select the Rattle pattern in this dropdown.

Rotation is the most common animation transform. From the dropdown we can select one of the bones of the model. Select bone1 here. You can then edit the rotation around the X, Y and Z axis. Try changing the X value and you should see the model start to spin. As bone1 is the root bone of the model, all the other bones move with it.
See if you can rotate the bones enough to create something that looks like a snake moving along the ground. Don't worry if you can't, we'll use the pre-made one in the next section.
Animation Clips
A clip is a collection of poses, that are then interpolated between over time. Select the RattleMove clip item to see the moving snake. Lets go through the blocks:

This is the header that contains the name of the clip, as well as an option to specify if the animation should loop or not.

Here we select the first pose, and specifiy a duration, which is how long it will take to blend from this pose to the next pose. The interpolation can also be set. S-Lerp stands for Spherical Lerp and is a linear interpolation but treats rotations as if they are on a sphere. There is also the Cubic option which can be better for more natural animations.

The second pose is specified, and this time the duration specifies how long until it should blend into the first pose, because Loops was set to true. Try playing around with the durations to speed up or slow down the animation.
Composition
Poses can also be composed together. When making more complex animation, it can be useful to split up body part poses, then combine them all together when needed. This can make for easily re-usable animation too, that you can import into other projects. See the Helicopter sample for more.
Note: the bone input on the compose layers can be used to join the layer bones to the base layer. Leaving one of the fields blank means use the first bone, which is usually ok as that will be the root. This can be seen in the
Helicoptersample.


