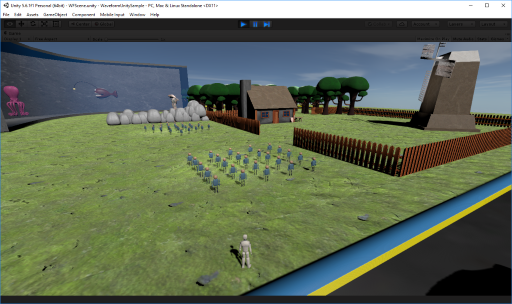
10. The Unity Sample
Get the Unity sample project from the Downloads Page. It is the same project that is shown in the video on the home page, and is provided so you can see how exactly to import Waveform models into a commonly used game engine. The controls for the sample are:
| Key | Action |
|---|---|
| WASD/Arrow Keys | Move player |
| Spacebar | Jump |
| R | Reset scene |
| ESC | Quit |
The rest of tutorial will go over the workflow used to get the models, textures, animation and physics working in-engine.
Note: The Unity sample ships without the
Libraryfolder, so Unity will rebuild it on open. If after all you see is an empty scene, selectFile -> Open Sceneand select theWFScenefile.
Exporting
All models are saved as FBX, so that we get animation and physics information exported too. Quads are used as Unity doesn't support NGons. Triangles could also be used, but Quads should give a slightly smaller file size.
Importing
An inport script is available under \Assets\Editor\ImportWaveformFBX.cs, which will pick up on any new FBX model and do several things:
- If it finds a
\Ragdoll\{modelname}.ragdollfile, then import the physics information and turn that into rigidbodies and colliders attached to the model's bones - Mark specific meshes as static, so they will only get colliders and no rigidbodies (useful for trees for example)
- Add a script to specific models that will turn them into ragdolls on impact with the player (used for the audience members, and the cars)
- Add specific joints to certain models, for example the hinge joint is used for the house door.
- Setup materials - as substance textures are used, if a
PBRfolder is found then these are hooked up to the correct material via the names
Creating Textures
The project was setup to work with substance textures by following this tutorial. Mostly the default substance materials were used, and some colours changed here and there.
Each material block in Waveform will appear as a separate texture item in Substance Painter. So if you use UV Ranges you can pull out specific parts of the model to then be able to assign different materials.
Lighting

Good lighting and shadows can add a lot to a scene. A single directional light for the sun lights most of the scene, with point lights added where needed to brighten some of the dark areas. In this sample a deferred renderer was used, so that as many point lights as needed could be added to the scene. The shadows were also more efficent to generate because of this.
Note the
Shadow Distancesettings was upped to a high number in order to keep shadows on the screen at all times, for a better looking scene.
Alternatively for an actual game, generating lightmaps would be a better idea especially as there are so many static objects in the scene. Be warned they can take hours to generate though. If you do decide to use lightmaps, take note that the Unity lightmapper doesn't support skinned meshes at this timen, so you'll need to import these models with the Rig Animation Type set to None. There is commented out code for doing this in the ImportWaveformFBX class. You will also need to to set the model to Static.
Animation

The player is setup to use the humanoid rig that is built into Unity. This is done in the model importer, and then the bone mappings configured as needed (if you name the bones appropriately, Unity mostly picks these up on it's own). If you get problems with it saying that the model is not in a T-Pose once you've mapped the bones, click on Pose -> Enforce T-Pose to get it into the correct position.
The other models with animation use the Generic option. They each then have an Animation Controller which contains the animation to play. As these animations mainly play on a loop, you need to tick the Loop Time option on the Model Animation Importer window. The audience members also have a script to randomly switch between jumping and waving.
The Player Controller
The Third Person Controller from the Standard Assets is used to provide movement for the player.
Note: A small code fix was applied to the
ThirdPersonCharacteron Line 58, to prevent a problem with the model shaking from left to right when the user presses the back button.
The robot was also exported with no physics data, and instead uses the single capsule rigidbody in the controller. This rigid body is active, meaning it can collide with kinematic rigid bodies of other models, in order to provide collision or turn them into ragdolls.
Physics

The AnimatedModelToRagdoll class handles turning models into a ragdoll on collision with the player. This disables the animator, then iterates all the rigid bodies of the model and sets IsKinematic = false. An impulse is also applied, calculated from the velocity of the player.
Usage
Feel free to use any of the assets or code from the Unity project in your own projects. The sample is intended for you to be able to hit the ground running, with respect to immediately getting your Waveform models working in-game.


